Building a sauna at home is mostly carpentry, with two parts that need real care: the heater with its power or chimney, and the moisture barrier behind the walls. The order below follows how professional builders plan a room, starting from the heater, because the heater decides the electrical work, the clearances and the ventilation.
1. Decide where it goes
Common spots are a basement corner, a large bathroom, a garage, or a separate building or barrel sauna in the yard. For each one, check:
- Power. An electric heater needs a dedicated 240 V circuit; how far the room is from the panel affects the electrician's cost.
- Water and drainage. A floor drain or a shower nearby makes cleaning and cooling off easier.
- Access for fresh air. You need a way to bring air in near the heater and let it out higher or lower in the room.
- For an outdoor sauna, a solid level base and, with a wood stove, safe chimney clearance from trees and buildings.
2. Pick the size
Smaller is easier to heat. A typical home sauna is about 4 by 6 feet for two people, 6 by 7 feet for a family, with a ceiling around 7 feet (2.1 m). A higher ceiling just stores heat where nobody sits.
| Users | Typical inside size | Usual heater |
|---|---|---|
| 1 to 2 | 4 × 4 ft to 4 × 6 ft | 3 to 4.5 kW |
| 2 to 4 | 5 × 6 ft to 6 × 7 ft | 4.5 to 8 kW |
| 4 to 6 | 7 × 7 ft to 8 × 8 ft | 8 to 12 kW |
Run your exact dimensions, including glass, through the sauna heater size calculator before you order anything.
3. Choose the heat source
Most indoor saunas use an electric heater. A cottage, cabin or backyard sauna without spare electrical capacity often suits a wood-burning stove better, and a few sites use gas. Our guide to electric vs wood-burning sauna heaters sets out the trade-offs, and gas and propane sauna heaters covers the third option.
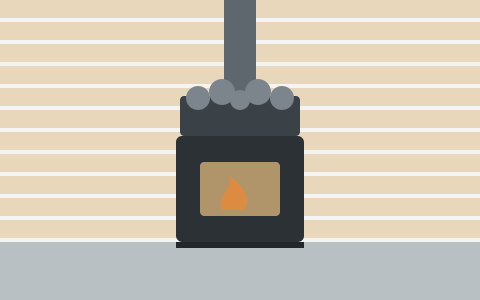
If you are building at a Canadian cottage, a wood stove avoids a costly power upgrade and keeps working when the power is out. Good starting points are the Harvia wood-burning sauna stoves sold in Canada, which include models with glass doors and large stone loads, or compare the wood stoves from Narvi, IKI and Kuuma. Pick the stove before you frame the room: its clearances to walls and benches fix where everything else goes.
4. Frame and insulate
Frame the walls and ceiling with ordinary studs, then insulate them well; the ceiling matters most because that is where the heat collects. Use mineral wool or another insulation rated for high temperatures rather than foam boards that are not meant for heat.
The vapour barrier is the step people most often get wrong. A sauna pushes hot, moist air into the walls, so the warm side of the insulation needs a continuous foil vapour barrier, with seams overlapped and taped with foil tape. Then leave a small air gap, usually with thin furring strips, before the wood panelling goes on. Without the barrier, moisture condenses inside the wall and causes mould and rot.
5. Line the room
Use soft, low-resin wood that does not get too hot to touch: western red cedar, spruce, aspen, hemlock and thermally modified woods are common choices. Tongue-and-groove boards, about half an inch to three-quarters of an inch thick, go on vertically or horizontally over the furring strips. Leave the wood unfinished inside; varnish and paint get sticky in the heat and can give off fumes.
6. Build the benches
- Put the top bench about 3 to 3.5 feet below the ceiling, so your head sits in the hot zone without touching it.
- Make benches at least 20 inches deep for sitting and about 24 inches or more if you want to lie down.
- Use smooth, knot-free boards with gaps between slats, and fix them from below so no screw heads touch skin.
- Keep the clearances from the heater shown in its manual, and fit a guard rail around an electric heater or stove.
7. Door, floor and light
- Door: it should open outwards, close on its own and have no lock. Tempered glass doors look good but lose heat; account for the glass when you size the heater.
- Floor: tile or sealed concrete with a slight slope to a drain is easiest to keep clean. Many builders add removable wooden duckboards on top for comfort.
- Light: use fixtures rated for sauna temperatures, mounted low or behind a wooden shade, and keep switches outside the room.
8. Plan the ventilation
A sauna needs fresh air in and stale air out. The usual pattern is an inlet low on the wall near or below the heater and an outlet higher up on the opposite side or under the bench. Get the vent positions from the heater manual before closing the walls. The full layouts are in our guide to sauna ventilation.
9. Wire or vent the heater
An electric heater must be the North American version with a CSA, cUL or cETL mark and must be wired by a licensed electrician to a dedicated circuit. Plan the route for the control cable and the temperature sensor at the framing stage. Our guide to wiring a 240 V sauna heater in Canada explains breaker sizes and permits.
A wood stove needs a chimney system rated for it, a non-combustible base and the clearances in its manual. Put stones in the heater as the maker shows; our article on sauna stones explains how.
10. Permits and inspection
Electrical work usually needs a permit and inspection from the provincial or state electrical authority. A new building in the yard, a wood stove or a chimney often needs a municipal building permit too. Tell your home insurer about the sauna, especially if it has a wood stove.
What drives the cost
Costs vary widely, so it is more useful to know where the money goes than to quote a single figure. The biggest items are usually:
- The heater and its control, which range from basic wall units to premium designs.
- Electrical work, especially if the panel needs an upgrade.
- Interior wood for walls, ceiling and benches.
- For outdoor saunas, the structure itself and its foundation.
A prefabricated kit trades flexibility for a faster build. Building from scratch costs less in materials but more in time. Either way, the heater choice is where to start: compare makers in the sauna heater brand comparison.
Questions buyers ask
How big should a home sauna be?
A two-person sauna is often about 4 by 6 feet and a family sauna 6 by 7 feet, with a ceiling around 7 feet (2.1 m). Smaller rooms heat faster and need a smaller heater.
Does a home sauna need a vapour barrier?
Yes. A continuous foil vapour barrier on the warm side of the insulation, with taped seams and a small air gap behind the panelling, stops moisture from condensing inside the walls.
What wood is best for a sauna?
Soft, low-resin woods that stay comfortable to touch, such as western red cedar, spruce, aspen and hemlock, plus thermally modified woods. Leave them unfinished inside the room.
Do I need a permit to build a sauna?
Electrical work usually needs a permit and inspection. A separate building, a wood stove or a chimney often needs a municipal building permit as well. Check local rules before you start.
Last checked November 8, 2026. Facts come from the brands' own sites and documents. How we check